Regarding the PM - Yup, it's all good. Regarding the frame issue, well I have spent many hours of googling to get to where I am with Photoshop. It is by no means "in my head" to where I can give much in the way of tutorial info. I "think" there are some default frames in the program. To use these I "think" you mouse click windows, actions and then choose from the window that opens. Click on the little triangle at the bottom and voila, a frame. My disclaimer - I am not sure how different my installation has changed over time from what you might see on your screen. My "think" is similar to the jw "apparently" or "evidently". You can download many frame actions free, but you have to learn where to copy the .atn files. I hope others might add to this. Sorry I can't give more comprehensive info.
The Photoshop Tutorial page.
by ScenicViewer 29 Replies latest social entertainment
-

-
therevealer
This is just one link.
-
ScenicViewer
Tonal Adjustments (Lightening, Darkening, Adjusting Contrast)
Sometimes we get a photo that is too light, too dark, or looks like it has a layer of haze over it. Adding contrast will usually fix the haze, and all three of these problems can be easily taken care of in Photoshop or other imaging program.
There are several lightening/darkening tools in Photoshop. The most powerful tool is Curves, which P. Elements (little brother of Photoshop) does not have. The second choice is Levels, which is powerful in itself, and most programs have it. Then there are simple Brightness/Contrast slider tools that work in many cases.
This post focuses on Levels.
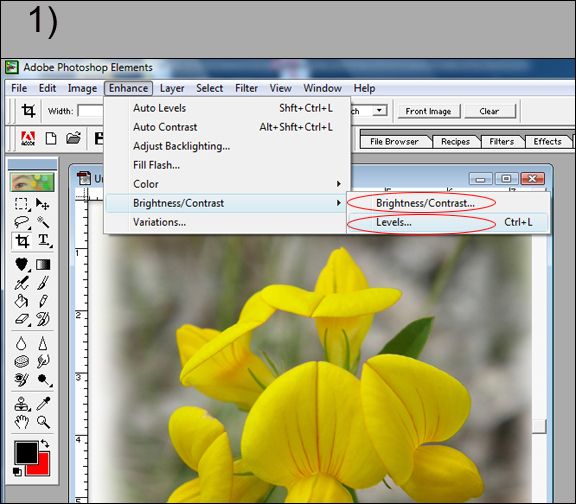
1) To access Levels, use drop down menu Enhance > Brightness/Contrast > Levels.
At this point you can also select the Brightness/Contrast sliders, circled below, but Levels can do more.
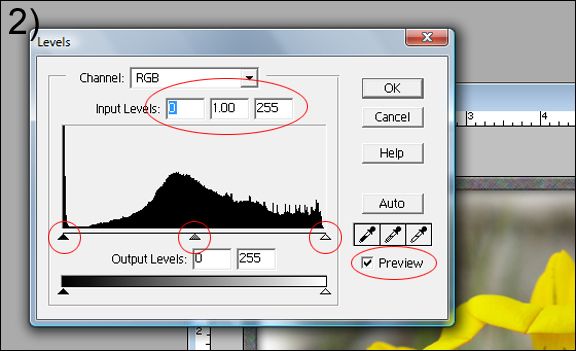
2) The Levels work box will appear. The main things to look for are circled in red.
Input levels: These numbers will change automatically as you adjust the sliders below. Unless you know exactly what numbers you need to enter, which is rare, look at the 3 sliders below.
- Black slider (on Left). This will adjust the dark portions of an image.
- White slider (on Right). This will adjust the light portions of an image.
- Gray slider (middle). This will adjust the mid-tones of an image.
If an image is too dark, click on the white slider and move it to the left. Then grab the gray slider and move it to the left too. Experiment with these two sliders until you like what you see. You likely won't need the black slider since it will only make the dark tones darker.
If an image is too light, use the black slider, move it to the right, then move the middle one to the right also. Experiment and adjust to taste.
If an image is neither too light, nor too dark, but looks like it has a layer of haze over it, it needs a contrast adjustment. To fix it, make the dark areas darker, and the light areas lighter. Use the black and white sliders for this. The gray slider can be used to fine tune the final result.
Tip: Use the Preview check box to see the difference your adjustments have made compared to the original image. Check it to see your changes, uncheck it to see the original image. When satisfied, click OK.
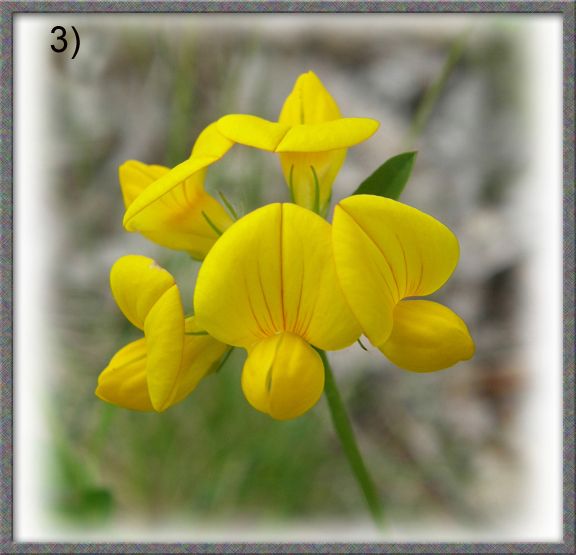
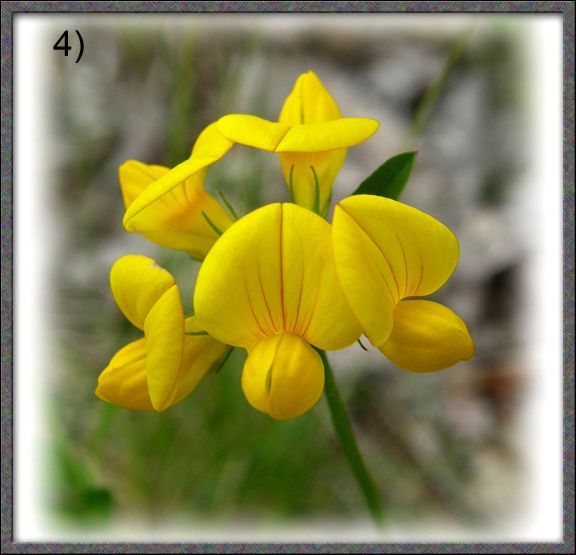
Here is an unadjusted image, then an adjusted one. The Input Levels in the final image are 37, 1.08, 2.31.
3) Unadjusted Image
4) Contrast added. The difference here is subtle, because the original image needed very litle tonal adjustment. The final result is definitely a matter of taste.
-
ScenicViewer
Sharpening
Every digital image, and even a film image that has been digitized by scanning, will need some degree of sharpening. The difference between an unsharpened image and a sharpened one can be dramatic.
Virtually all digital cameras have a built-in sharpening feature that can be accessed thru the camera's menu. It's usually a scale something like this,
-2 -1 0 +1 +2.
I tend to leave my camera at the factory default setting of 0, and do the final sharpening in Photoshop, which offers much more control over the final result.
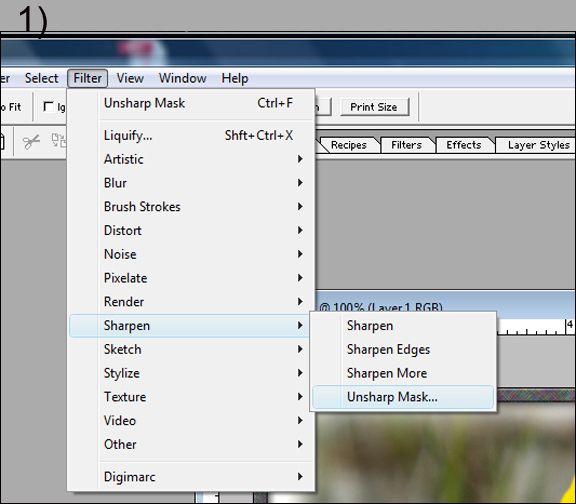
1) The sharpening tool is part of the Filter menu. Filter > Sharpen > Unsharp Mask
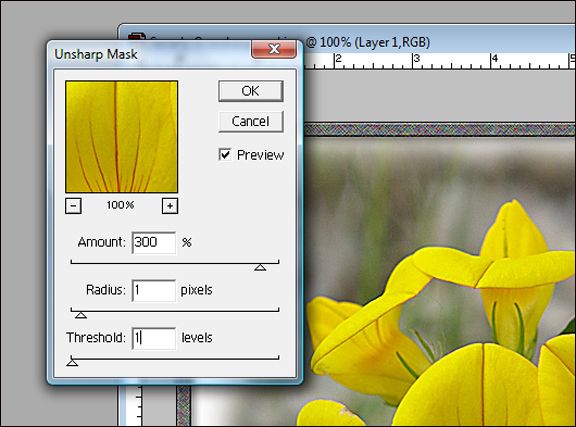
The Sharpening Work Box will appear, with settings for Amount, Radius, Threshold. A good starting point is 250, 1.0, 4 respectively, but the final numbers can vary greatly since each image is different. Some pictures need much more sharpening than others.
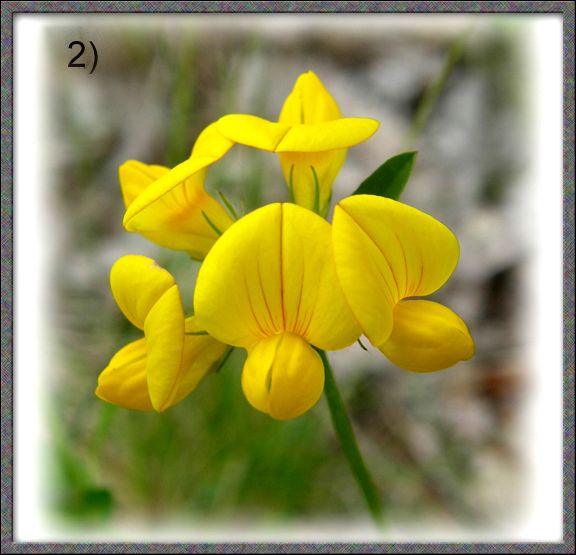
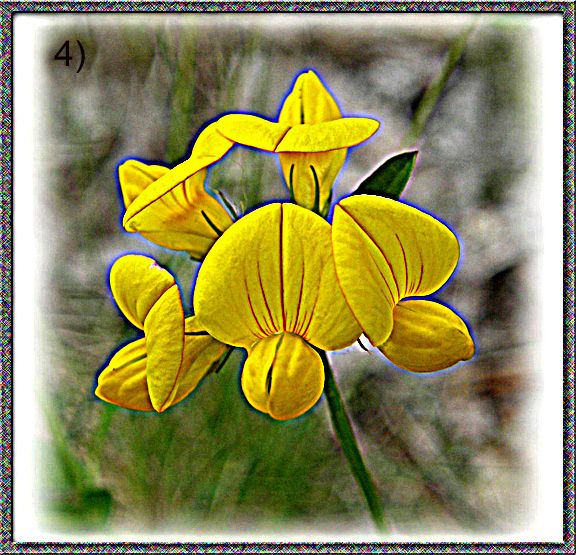
2) The unsharpened photo vs the sharpened one.
This image is unsharpened,
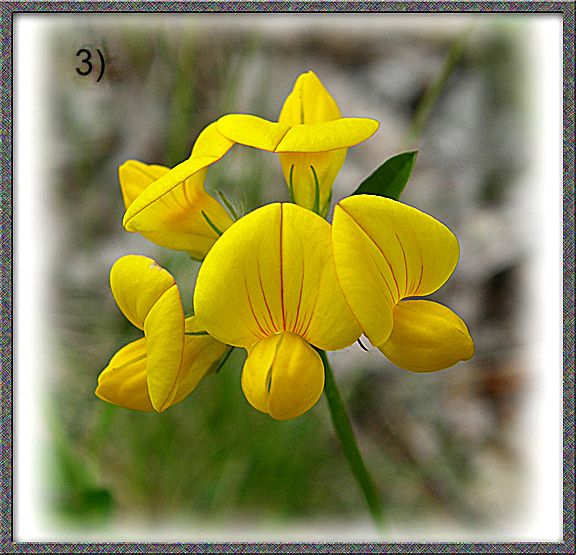
Sharpened image, with values of values of Amount 300, Radius 1.0, Threshold 1. Lines are more vivid, and textures not seen before are now visible.
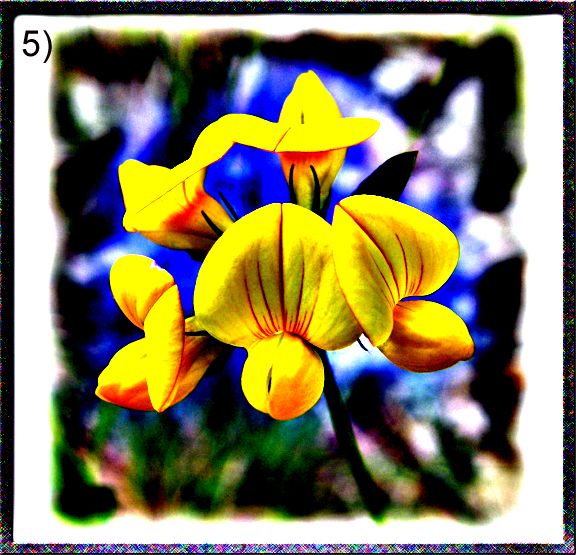
Be carefulnot to oversharpen. This image shows why. Strange things begin to happen, like the blue color fringe aroung the petals.
Amount 500, Radius 3, Threshold 0.
However, the sharpening tool can become a creative way to achieve special effects, if you want it. This image is severly oversharpened, but it has it's own appeal.
Amount 500, Radius 300, Threshold 0.
Thanks to Therevealer for allowing me to isslustrate this using his great wildflower picture!
-
therevealer
Totally simple youtube on creating frames
http://www.youtube.com/watch?v=RShKQM3xvdk
I know that you can get way fancier, but then it is more difficult. This youtube shows how to make a simple border/frame and make it as an action. Actions are .atn files and can be saved anywhere - as long as you no where to find them again.
-
-
Twitch
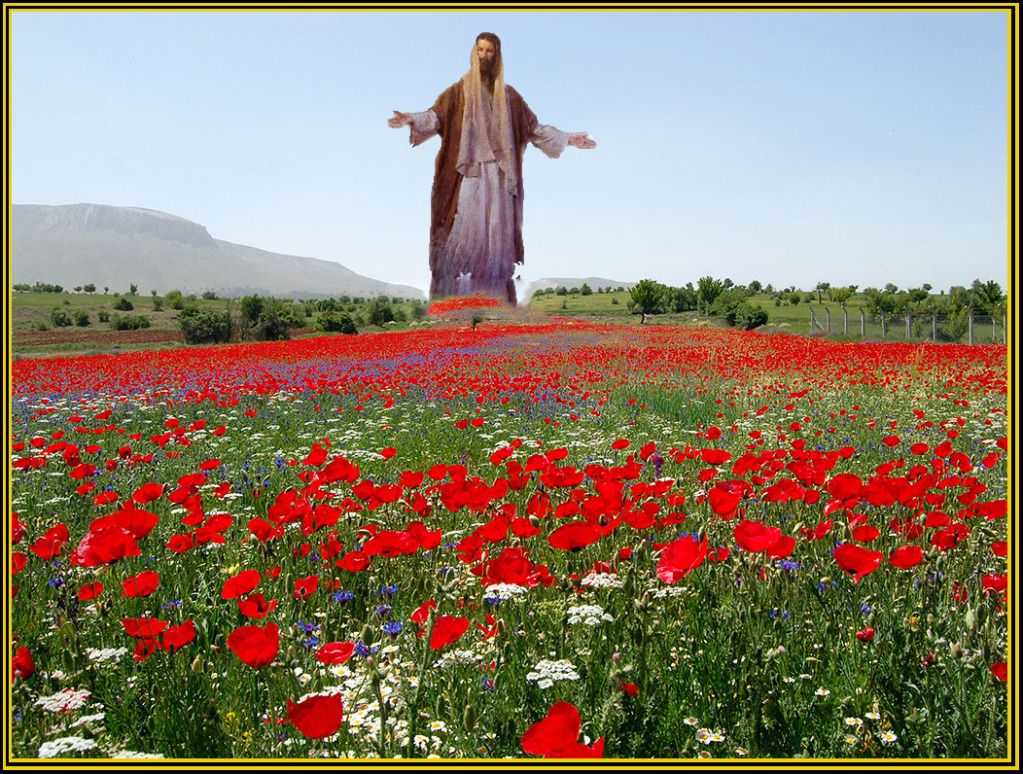
Tell me that ain't a poppy field.
-
Chariklo
Bookmarking.
This thread is a fantastic resource!
Thank you!
-
cliff
USE LAYERS!
Disciplining oneself to use layers properly will save a lot of grief in the long run.
Layers can be thought of as transparent sheets of film in a stack, which can be sorted, switched on (visible) and off and locked at will.
The very first step on importing an image is to copy it to another layer, lock it and make it invisible. You can then always go back to the original without saving it as a different file!
Each significant edit, added text etc should all be on separate layers and can then be viewed / edited independently.
Just my 2c ....
Cliff
-
therevealer
@twitch - It is from this thread earlier on and just fulfilling a request. I found that this is the url
http://www.padfield.com/bible-times/lilies/images/Iconium-Poppies-03.jpg
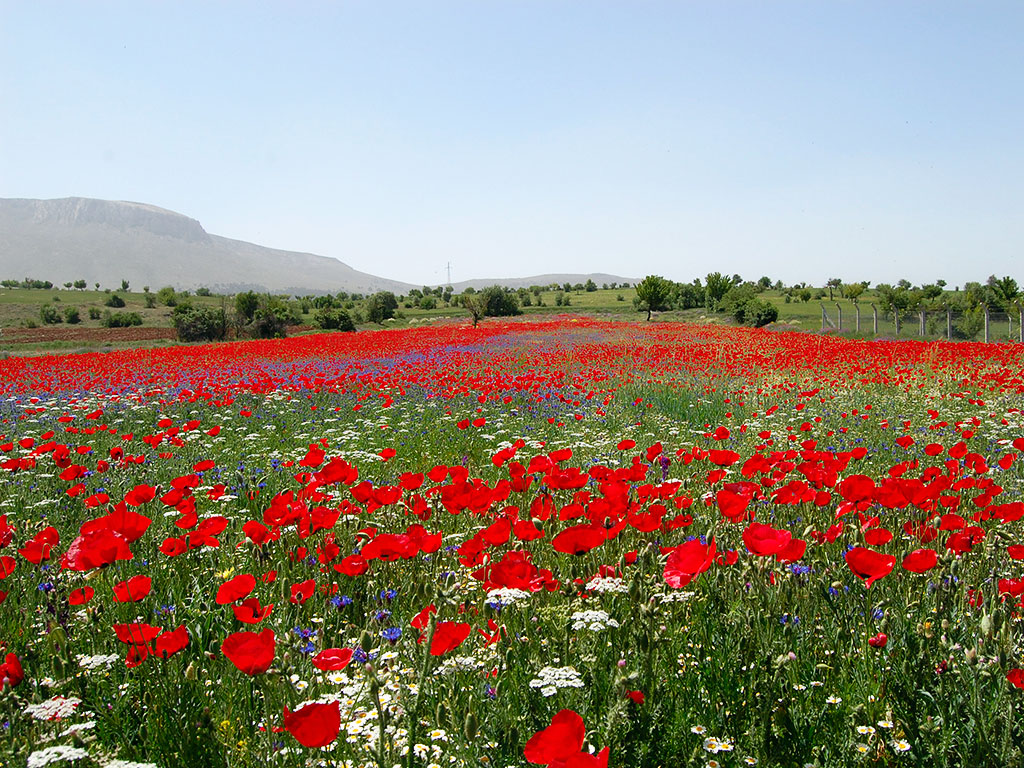